

How to Make a Baby Memory Book: Step-by-Step
You can make a baby memory book with a blank scrapbook, a small set of materials and a simple page plan. The aim is not to create a perfect craft project; it is to build a book that is easy to update and strong enough to hold the memories you value.
This step-by-step guide covers the structure, materials and prompts. Set up the main sections first, then decorate a little at a time as photographs and stories are added.
What you will need
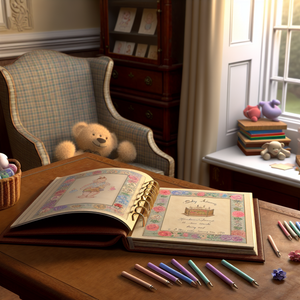
- A bound scrapbook, ring-bound album or good-quality blank notebook
- Photo-safe adhesive or photo corners
- A pen that writes cleanly on your chosen paper
- A ruler, pencil and eraser for planning layouts
- Scissors and a paper trimmer, used by an adult
- Plain or patterned paper for headings and pockets
- Optional stickers, washi tape, stamps or printed labels
- A small envelope or pocket for flat keepsakes
If the book is meant to last, choose acid-free, photo-safe paper and adhesive where possible. Test pens and glue on a spare page first. Keep scissors, adhesives and small decorative pieces away from babies and young children.
Step 1: Decide the time period
Choose a clear finish line before planning pages. A first-year book is manageable and gives enough room for pregnancy, birth and monthly changes. A longer early-years book needs fewer pages per month so it does not run out of space.
Write the chosen period on a note: for example, “pregnancy to first birthday”. This one decision controls the number of sections and prevents the opening months taking over the whole album.
Step 2: Choose the book format
A ring-bound album opens flat and can accept extra pages, but the rings add bulk. A traditionally bound scrapbook feels more like a finished book but has a fixed page count and may not close neatly around thick keepsakes. A notebook is compact and inexpensive, although lighter paper may not suit photographs or wet ink.
Check the dimensions against the photographs you normally print. If you want standard prints plus writing, sketch one example spread before buying the book.
Step 3: Plan the page order
Make a paper list of sections before touching the album. A practical first-year structure is:
- Title and dedication
- Our family and family tree
- Waiting for baby
- Baby shower or preparations
- Birth story and first photograph
- Coming home
- Monthly pages from one to twelve months
- Firsts and favourite things
- Family, friends and celebrations
- First birthday
- A letter for the future
Count the available sides, reserve the final two pages, then allocate space. Leave two or three unlabelled spreads for moments you cannot predict.
Step 4: Create a repeatable layout
Use one simple layout for recurring pages: a heading, one or two photographs, a date line and three short prompts. Repeating that structure makes the book feel coherent and dramatically reduces the work.
Before gluing anything, place the photograph and labels on the page, close the book carefully and check that nothing sits too close to the spine. Mark positions lightly in pencil. Add adhesive only when the balance feels right.
Step 5: Add useful prompts
Prompts should make writing easier. For each month, try:
- “This month you loved…”
- “You made us laugh when…”
- “A small detail we want to remember…”
- “People you spent time with…”
- “A new thing you tried…”
For pregnancy, birth, routines, firsts and letters, use the complete list of 50 baby memory book prompts. Keep the wording inclusive and change any family-tree labels that do not fit your family.
Step 6: Prepare pages in batches
Create the title strips, month labels and photo corners for several pages at once. Store the loose pieces in a labelled envelope inside the back cover. Batch preparation keeps the style consistent and means each update only requires a photograph and a few sentences.
Do not decorate every blank page in advance. You may later need a landscape photo, a longer story or extra space for twins and siblings.
Step 7: Add photographs and keepsakes
Print a mix of portraits, family photographs and ordinary scenes. Include captions with names, dates and places—details that may not be obvious in ten years. If a keepsake is bulky, photograph or scan it instead of forcing it into the binding.
Small flat items such as a copy of a card, a hospital label or a piece of wrapping paper can sit in a pocket. Keep original documents and anything irreplaceable stored safely elsewhere, and back up digital photographs separately.
Step 8: Write short, specific stories
A useful entry needs only four parts: the date, what happened, one detail and how people reacted. “First laugh” is a label; “You laughed when Dad sneezed at breakfast, then waited for him to do it again” is a memory.
Use your natural voice. Spelling corrections, different handwriting and contributions from relatives make the book feel like a family record rather than a formal report.
Step 9: Make hand and foot prints carefully
If you include prints, use a product specifically sold as baby-safe and follow its instructions. Prepare the page and cleaning materials in advance, have another adult help if possible, and never force the moment. A photograph of a hand or foot beside a familiar object is an easy alternative.
Step 10: Choose an update routine
Keep a dated note on your phone and transfer two or three items once a month. Use the dates in your camera roll if you fall behind. A five-minute entry is better than waiting for a free afternoon that never arrives.
Store the book flat in a dry place away from direct sunlight. Do not leave loose pens, wet adhesive or raised decorations between the pages.
A quick 45-minute setup
- 10 minutes: choose the time period and list the sections.
- 10 minutes: count pages and mark the section openings with removable notes.
- 15 minutes: create one repeatable monthly layout.
- 10 minutes: write the dedication and first pregnancy or birth entry.
You can stop there. The structure is ready, and the decoration can grow with the book.
DIY or ready-made?
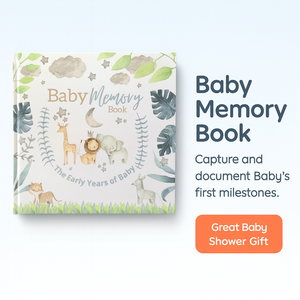
Make your own if you enjoy crafting, want unusual family sections or need flexible page numbers. Choose a guided book if you want the prompts and page order already prepared. Forever Lily's 36-page baby memory book covers pregnancy through the first year and includes photo spaces, family pages, first tastes, holidays, prints, artwork and a message from the parents.
Our guide to choosing a baby memory book compares formats, page structures and practical features before you decide.
Frequently asked questions
Can I make a baby memory book without craft skills?
Yes. Use a plain notebook, one photograph per spread and a black pen. Consistent headings and honest captions are enough; decoration is optional.
How many pages do I need?
For a first-year DIY book, 30 to 50 usable sides can cover family, pregnancy, birth, monthly updates and a final letter. Count sides rather than sheets, and reserve several blank pages.
What if I am already behind?
Start with today's page. Rebuild only the earlier moments you remember clearly from photographs, messages and calendars. A shorter accurate book is more meaningful than invented detail.
Begin with the page plan, not the decorations. Once the structure works, the personal details will make the book unique.